Does Carne de Sol Need Seasoning? Tips and Recipe!

Find out if sun-dried meat needs seasoning, how to properly desalinate it, learn a recipe for fried sun-dried meat, and check out tips on side dishes, storage, and much more!
Introduction
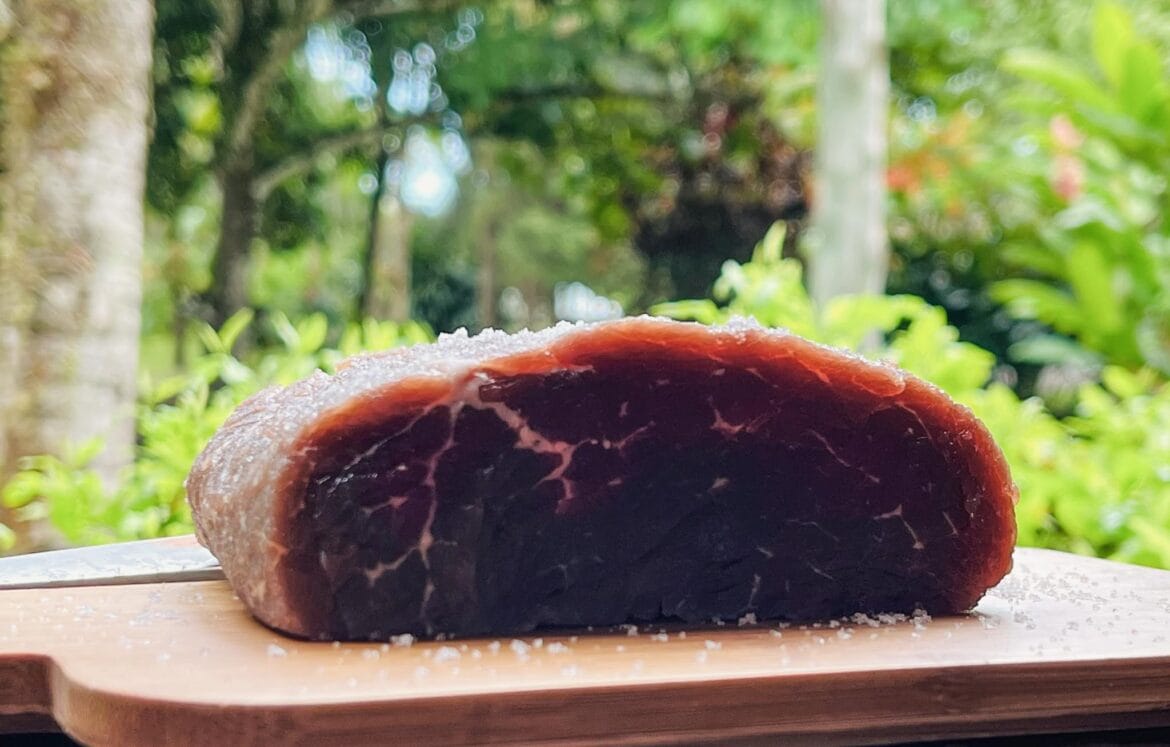
A sun-dried meat is an icon of northeastern Brazilian cuisine, famous for its distinctive flavor and unique texture. But does sun-dried meat needs seasoning need to be seasoned before being fried or prepared in other ways? This is a common question that we will clarify in this article. Additionally, you will learn how to desalinate sun-dried meat, discover a practical recipe for fried sun-dried meat, and receive valuable tips on side dishes, freezing, and much more. Get ready to uncover all the secrets of this delicacy and enjoy its authentic flavor!
Does Sun-Dried Meat Need Seasoning? Understanding the Flavor
The answer is: it depends. A sun-dried meat, due to its curing process, it already has a characteristic and slightly salty flavor. Therefore, the need to season it before preparation depends on your personal taste and how salty the meat is.
In general, if the sun-dried meat is well desalinated, a light seasoning is enough, enhancing its natural flavor even more. Many people even prefer not to season the sun-dried meat, appreciating only its authentic taste. However, if you prefer stronger flavors or want to give a special touch to the meat, seasoning is a great option.
Seasoning for Sun-Dried Meat: Simplicity and Flavor
If you choose to season your sun-dried meat, remember that less is more. The goal is to enhance the meat’s flavor, not mask it. Here are some seasoning suggestions that pair very well with sun-dried meat:
- Garlic: Crushed, chopped, or in paste form, garlic is a classic seasoning that gives an irresistible flavor to sun-dried meat.
- Onion: Sliced, chopped, or sautéed, onion adds sweetness and aroma to the meat.
- Black Pepper: Freshly ground black pepper adds a spicy touch and enhances the meat’s flavor.
- Red Chili Pepper: For those who like a spicier flavor, chopped red chili pepper (with or without seeds) is an excellent option.
- Cilantro: Fresh and chopped, cilantro is widely used in northeastern cuisine and pairs perfectly with sun-dried meat.
- Rosemary and Thyme: Fresh or dried herbs that add a delightful aroma and a Mediterranean touch to the meat.
- Bay Leaf: A bay leaf during cooking imparts a subtle and aromatic flavor.
- Cumin: A pinch of ground cumin can give sun-dried meat a special and unique touch.
- Olive Oil or Bottle Butter: Besides helping to brown the meat, they add flavor and juiciness.
- Lemon: A few drops of lemon juice can be added to the seasoning or at serving time to give a touch of acidity and freshness.
Tip: If you season the sun-dried meat, do it after desalinating and before frying or cooking. A simple seasoning with crushed garlic, black pepper, and a drizzle of olive oil makes a big difference.
Do You Need to Desalinate Sun-Dried Meat? Yes, and Here’s How!
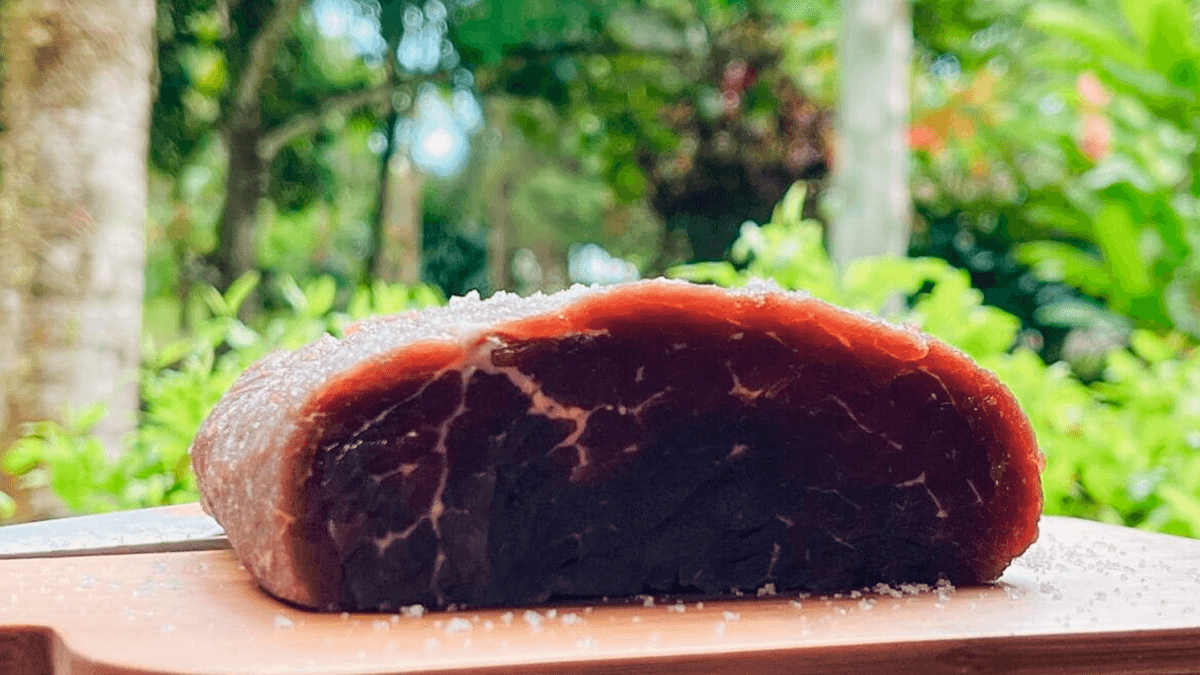
Yes, sun-dried meat needs to be desalinated before preparation. The curing process of sun-dried meat uses salt to dehydrate and preserve, which leaves it naturally salty. Desalination is essential to remove excess salt and ensure the final dish is not too salty.
How to Desalinate Sun-Dried Meat: Step by Step
There are two main methods to desalinate sun-dried meat:
1. Desalinate with Cold Water (Traditional):
- Cut the meat: Cut the sun-dried meat into medium pieces or the size you want for your recipe. This makes desalination easier.
- Wash the meat: Wash the pieces of sun-dried meat under running water to remove surface salt.
- Soak in cold water: Place the pieces of meat in a large bowl, basin, or pot and cover completely with cold water.
- Refrigerate: Put the bowl in the refrigerator and let the meat soak for at least 12 hours.
- Change the water: Change the water every 3 or 4 hours, discarding the salty water and replacing it with clean cold water.
- Desalination time: The total desalination time may vary depending on the thickness of the meat, the amount of salt, and your personal preference. Generally, 12 to 24 hours are sufficient.
- Check the salt level: After 12 hours, check the salt level. Cut a small piece of meat, quickly cook it in an unseasoned pan, and taste. If it’s still too salty, change the water again and let it desalinate for a few more hours, checking every 2 hours.
2. Desalinate with Boiling Water (Quick):
- Cut the meat: Cut the sun-dried meat into medium pieces or desired size.
- Wash the meat: Wash the pieces under running water.
- Boil in water: Put the pieces in a large pot and cover with water. Bring to high heat and let boil.
- Scald the meat: Once the water boils, cook the meat for 15 to 20 minutes.
- Discard the water: Drain and discard the water from the pot.
- Repeat the process: Cover the meat with water again and repeat the boiling process one or two more times, changing the water each time.
- Check the salt level: After the last boiling, check the salt level. If necessary, repeat once more.
Tips for Desalination:
- Use cold water: Cold water is more effective at removing salt and helps keep the meat at a safe temperature.
- Desalinate in the refrigerator: For greater food safety, use the traditional desalination method (cold water) in the refrigerator.
- Test the salt level: Always check the salt level before cooking sun-dried meat. It’s better to desalinate a bit more and adjust the seasoning in the recipe than to have meat that is too salty.
- Dry the meat: After desalinating, dry the pieces well with paper towels before frying or cooking. This helps achieve a more golden crust and prevents the meat from releasing too much water during cooking.

Fried Sun-Dried Meat Recipe: Simple and Delicious
Now that you know how to desalinate sun-dried meat, let’s move to a classic and tasty recipe for fried sun-dried meat:
Ingredients:
- 500g of desalinated sun-dried meat
- 1 large onion sliced
- 3 cloves of garlic, chopped or crushed
- 2 tablespoons of bottle butter (or regular butter, or vegetable oil)
- Ground black pepper to taste
- Chopped fresh herbs (parsley and green onion) to finish (optional)
Preparation Method:
- Cut the meat: Cut the desalinated sun-dried meat into medium strips or cubes.
- Heat the skillet: In a large, heavy-bottomed skillet, heat the bottle butter (or regular butter, or oil) over medium-high heat.
- Fry the meat: Add the pieces of sun-dried meat to the skillet and fry until golden on all sides, stirring occasionally. Frying time varies according to the size of the pieces and stove power, but generally takes between 5 and 10 minutes.
- Add onion and garlic: Add the onion slices and chopped garlic to the skillet and sauté with the meat until the onion is soft and lightly golden.
- Season: Season with black pepper to taste. If necessary, add a pinch of salt, but remember that sun-dried meat already has some residual salt content.
- Finish and serve: Turn off the heat and finish with chopped fresh herbs, if desired. Serve fried sun-dried meat immediately, accompanied by your favorite sides.
What to Serve with Sun-Dried Meat? Side Dish Suggestions
Sun-dried meat is a versatile dish that pairs with a wide variety of side dishes. Here are some suggestions to help you create a complete and delicious meal:
- Green Beans or Tropeiro Beans: A classic and unbeatable combination! Cooked and seasoned green beans or tropeiro beans, made with manioc flour, bacon, and eggs, are traditional sides that blend perfectly with sun-dried meat.
- White Rice: Fluffy white rice is a simple option that pleases everyone.
- Cassava (Yuca) Puree (Aipim/Macaxeira): A creamy cassava puree, also known as aipim or macaxeira, is a typical northeastern side dish that pairs very well with sun-dried meat.
- Pumpkin Puree: To vary the menu, try pumpkin puree, which has a sweet flavor that contrasts with the saltiness of the sun-dried meat.
- Farofa: A well-seasoned farofa, made with manioc flour, butter, onion, garlic, and bacon, is a great option to add crunch and flavor to the dish. Also try banana farofa or couscous farofa.
- Vinaigrette: A simple vinaigrette with tomato, onion, bell pepper, fresh herbs, vinegar, and olive oil adds freshness and acidity to the meal.
- Boiled or Fried Cassava: Pieces of boiled or fried cassava are delicious sides that go very well with sun-dried meat.
- French Fries or Roasted Potatoes: Crispy french fries or herb-roasted potatoes are practical options that please all palates.
- Green Salad: A salad of mixed greens such as lettuce, arugula, and watercress with tomato and onion is a light and healthy option to accompany sun-dried meat.
- Fried Plantain: Fried plantain adds a sweet and sour touch to the dish and is a much-appreciated accompaniment in the Northeast.
Can Sun-Dried Meat Be Frozen? Storage Tips
Yes, sun-dried meat can be frozen, both raw (desalted) and cooked or fried. Freezing is a great way to extend the shelf life of the meat and always have this tasty ingredient available.
Freezing Raw (Desalted) Carne de Sol:
- Desalt the meat: Completely desalt the carne de sol by following one of the methods we taught earlier (cold or boiling water).
- Dry well: Thoroughly dry the meat pieces with paper towels to remove excess moisture. This helps prevent ice crystals and freezer burn.
- Portion (optional): If desired, cut the meat into smaller pieces according to how you plan to use it later.
- Wrap well: Wrap each piece of meat individually in plastic wrap, pressing firmly to remove air. Then place the wrapped pieces into a good quality freezer bag.
- Remove air: Remove as much air as possible from the bag before sealing. You can use a straw to suck out remaining air or a vacuum sealer if you have one.
- Label: Label the bag with the product name (“Raw Desalted Carne de Sol”) and the freezing date.
- Freeze: Place in the freezer and store for up to 6 months.
Freezing Cooked or Fried Carne de Sol:
- Cook or fry the meat: Prepare the carne de sol according to your favorite recipe (cooked, fried, etc.).
- Cool completely: Allow the carne de sol to cool completely at room temperature before freezing. This prevents vapor formation and consequently ice crystals.
- Portion: Divide the meat into individual or family-sized portions according to your needs.
- Store in containers: Place the meat portions in airtight containers suitable for freezer use or in plastic freezer bags.
- Remove air: If using plastic bags, remove as much air as possible before sealing.
- Label: Label the containers or bags with the product name (“Cooked Carne de Sol” or “Fried Carne de Sol”), freezing date and, if possible, the recipe or dish it is intended for (e.g., “Shredded Carne de Sol for Escondidinho”).
- Freeze: Place in the freezer and store for up to 3 months.
Tips for freezing carne de sol:
- Do not freeze meat while still hot: Wait for it to cool completely to avoid ice crystal formation and bacterial growth.
- Freeze in portions: Divide the meat into portions you will use at one time to avoid thawing more than necessary.
- Use appropriate packaging: Use airtight containers or good quality freezer plastic bags to protect the meat from air contact and prevent freezer burn.
How to Thaw and Use Frozen Carne de Sol:
- Thaw in the refrigerator: The best way to thaw carne de sol is in the refrigerator. Transfer the frozen portion from the freezer to the fridge and let it thaw slowly for a few hours or overnight (about 8 to 12 hours for small pieces and up to 24 hours for larger cuts).
- Do not thaw at room temperature: Never thaw carne de sol at room temperature as this encourages bacterial growth.
- Use thawed meat: After thawing, carne de sol can be used normally in your recipes. If raw, cook it as preferred. If cooked, just heat it up and use it in the desired dish.
- Do not refreeze: It is not recommended to refreeze carne de sol that has already been thawed.
Image Source: farturabrasil nacozinhadahelo