
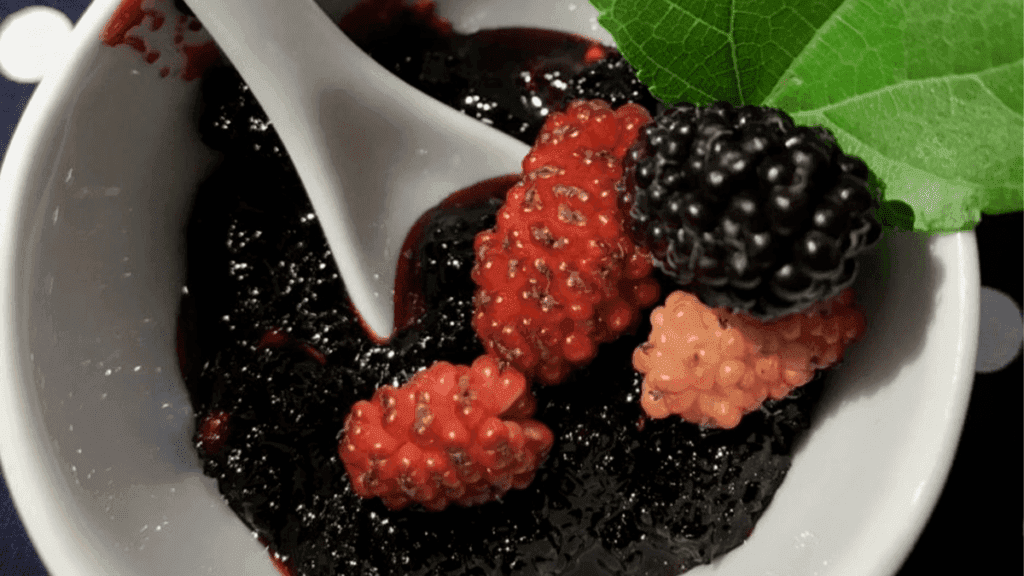
Get ready to be enchanted by the explosion of flavor of this Homemade Blackberry and Raspberry Jam! A perfect combination of two irresistible red fruits, resulting in a jam with a vibrant color, velvety texture, and a sweet and sour taste that will win over your palate. Ideal to accompany breads, toasts, cookies, cheeses, and yogurts, this jam is the right choice for those seeking a special homemade touch in their meals. In this article, you will learn the step-by-step to prepare this delight, along with tips to ensure the perfect consistency and suggestions on how to make the most of your jam. Shall we discover together the secrets of this amazing recipe?
Red Fruit Jam: An Irresistible Classic
A red fruit jam is a classic that never goes out of style. Versatile and flavorful, it can be used in various preparations, from breakfast to dessert. The combination of blackberry and raspberry, in particular, is especially delicious, as it blends the sweetness and light acidity of these two fruits in perfect harmony. Making jam at home is a way to reclaim authentic flavors and have full control over the ingredients used, ensuring a healthier and personalized final product, evoking nostalgic memories and an age-old practice—after all, jam making has been around for many years, becoming a tradition that persists to this day. And although they are not made to last all year, it is simpler to make than most people imagine; the sweetness and acidity of this dessert become a wildcard that fits very well in various meals and occasions, making moments even more special with this culinary classic that pleases all tastes.
Ingredients: The Secret to a Perfect Jam
To make your Homemade Blackberry and Raspberry Jam, you will need:
- 125g of fresh blackberries (usually 1 box)
- 125g of fresh raspberries (usually 1 box)
- 1 tablespoon of lemon juice (about 1 medium lemon or ½ large lemon)
- 2/3 cup of granulated sugar (100g)
Tips about the Ingredients:
- Fresh Fruits: Prefer fresh, firm, and ripe fruits. They guarantee a more intense flavor and vibrant color to the jam. The recipe can also be made with frozen fruits, but in this case, be careful with the amount of water, as fruits can release a lot of water when thawed, making the jam very liquid. In that case, it is recommended to reduce the sugar quantity by half, since the water can dilute it and diminish the flavor. If you opt for fresh and organic fruits, it is important to ensure that the blackberries and raspberries are not bruised or moldy, which can easily happen when exposed to humid and warm places, compromising the final result. Blackberries should have a darker purple color and raspberries a red hue; both should be handled gently as they bruise easily due to their delicacy. Blackberries and raspberries can be found in local markets and municipal markets, where they tend to be fresher, especially during harvest season, or in larger markets and fruit and vegetable chains. Always prefer seasonal and, if possible, organic fruits.
- Lemon: Lemon juice is essential for the jam because it helps activate the pectin in the fruits, a substance responsible for giving the jam its consistency, and it also acts as a natural preservative. Moreover, lemon balances the sweetness and enhances the fruit flavors.
- Sugar: Granulated sugar is the best choice for this recipe because it has a neutral flavor and dissolves easily. However, crystal or demerara sugar can make the jam more granular, which some people like. Ideally, granulated sugar should be used. The amount of sugar can be adjusted according to the fruits’ sweetness and your personal taste, but remember it is very important for the final consistency. If you reduce it too much, the jam may not thicken as expected and will be too runny because it is sugar that binds to the pectin present in the fruit skins and seeds. If you want to reduce sugar but ensure the jam thickens, it is ideal to use confectioner’s sugar, found in baking supply stores. Confectioner’s sugar can also be sprinkled over the cooled jam for decoration, making it look very attractive.
- Pectin: Pectin can be found in its natural form or as a powder, which can be purchased at natural product stores. It acts as an agent that guarantees the jam’s consistency and also serves as a natural preservative, extending the recipe’s shelf life. If you want a firmer, thicker jam, investing in pectin powder is a good idea, which makes it easier to reach the desired jam consistency—just add it with the sugar before heating the fruits. But remember: this jam is meant to be consumed within a month. If you want to extend this period up to a year, you need to prepare a larger quantity and take precautions, such as sterilizing jars and vacuum sealing them, ensuring your jam remains preserved longer.
- Pot: Choose a medium-sized pot for this recipe. Very thin or very small pots can burn the fruits more easily or cause the syrup to overflow when boiling. Prefer pots with a thicker bottom or entirely thick to distribute the heat evenly. Another tip is to invest in a non-stick pot, just like for cakes, to prevent the syrup from sticking and burning, which also makes cleaning easier. An ideal option is a casserole pot, which is usually wider than deep and has two handles to facilitate handling, as well as a wider opening that makes it easier to stir the fruits without splashing too much.
Preparation: The Secret to Jam with the Perfect Consistency
Making jam may seem complicated, but with this step-by-step, you will see it is simpler than you think. Follow along:
- Prepare the Fruits: Wash the blackberries and raspberries thoroughly under running water and, if possible, use a brush designed for fruits and vegetables to ensure complete cleaning. Drain and gently dry them with paper towels or a clean, dry kitchen cloth. This step is important to remove any dirt on the fruits, which also need to be dry to avoid excess water in the recipe.
- Cook the Fruits: In a medium pot, preferably with a thick bottom, place the blackberries, raspberries, and lemon juice. Cook over medium heat for about 5 to 10 minutes, stirring occasionally, until the fruits are soft and the syrup is glossy but still has some small pieces, which will give the ideal texture for the jam. This time may vary depending on the heat intensity and the pot you use. Be careful that the fruits cook but do not lose all their texture. Remember, the jam will become even thicker once cooled, unless you want to make a syrup, not a jam.
- Add the Sugar: Add the sugar and mix well, stirring constantly to dissolve it completely and incorporate it into the syrup. Then let the mixture boil over medium-low heat, being careful not to burn it. Keep stirring with a spatula or wooden spoon. This step is crucial to ensure the jam’s sweetness and consistency and requires attention to avoid burning. Continue cooking, stirring occasionally, for about 20 to 30 minutes, or until the jam reaches the desired consistency. To check, stir and assess the texture. To know if the jam is ready, check if it is detaching from the bottom and sides of the pot. When it reaches this point, it is ready to be served or stored in sterilized jars. Remember it only reaches this consistency when cooled, so be careful not to overcook it and make it too thick or burnt. A safe and effective method is to take small portions out with a spoon and place them on a saucer to test consistency. If you have a cooking thermometer, the jam is ready when it reaches 105 ºC. Another way to check is to drag the jam across the bottom of the pot using a wooden spoon or spatula; if it takes time to return to place, it is ready.
- Cold Saucer Test: To check the jam’s consistency, place a saucer in the freezer before starting. After about 20 minutes of cooking, remove the pot from the heat and put a teaspoon of jam onto the cold saucer. Wait a few seconds and tilt the saucer. If the jam flows slowly with a thick consistency, it is at the perfect point. If it flows too fast like water, return the pot to low heat and cook for a few more minutes, stirring continuously. This test is very important to ensure the jam was made correctly and is at the right consistency.
- Jar and Store: While the jam is still hot, carefully (to avoid burns), transfer it into sterilized glass jars that have been previously boiled in water, with caps also boiled, leaving about 1 cm of empty space at the top. It is crucial that jars and lids are very well sterilized to prevent contamination, bacteria, and mold growth. Thus, if your intention is to extend the jam’s shelf life, it must be stored in thoroughly cleaned containers, with hands also well sanitized, and while the jam is still hot. Seal the jars well, turn them upside down resting on a kitchen towel or rack, which vacuum seals the jars, increasing their durability, and let them cool completely at room temperature. This process helps create a vacuum, prolonging the jam’s preservation and preventing leaks. Store the jam in a cool, dry place, away from direct light, or preferably in the refrigerator to ensure durability and consistency. After opening, keep refrigerated and consume within 1 month. Before serving, take the jam out of the fridge some time in advance so the texture doesn’t become too hard.
Tips for a Perfect Blackberry and Raspberry Jam
- Use Quality Fruits: Prefer fresh, ripe, and seasonal fruits because they have more flavor and natural pectin, resulting in a tastier, more consistent jam. If they are organic, even better.
- Do Not Over-Stir: Stir the jam just enough to prevent it from sticking to the bottom of the pan. Stirring too much can incorporate air and make the jam cloudy. Keep mixing gently and carefully.
- Adjust the Amount of Sugar: If the fruits are very sweet, you can reduce the amount of sugar a bit if you find it necessary. But remember that sugar is also important for preserving the jam, so do not reduce it excessively, or the shelf life and consistency of your jam may be compromised.
- Try Variations: Add a touch of orange juice, lemon zest, a cinnamon stick, or a pinch of red pepper to create new flavors. It’s important to add the ingredients little by little and always taste to balance the flavors until you find what you like best. Another option is to add spices like nutmeg, star anise, or ginger, which can bring a stronger flavor to the jam and also some heat, depending on the ingredient.
- Enjoy the Versatility: This jam is delicious with bread, toast, cakes, cookies, cheeses, yogurts, and even as a filling or topping for pies and ice creams. It pairs very well with cream ice cream, cheese ice cream, chocolate ice cream, and even lemon pie.
- Sterilize the Jars: To store the jam, always use previously sterilized glass jars. You can do this by boiling the jars and lids for about 15 minutes, but be careful and only add the jars to the boiling water after it is already boiling, so they don’t break. Do not use plastic containers.
Recommended Products to Make Preparation Easier
- 9-Piece Teflon Cookware Set with Glass Lids, Non-Stick: A medium, thick-bottomed pot from this set will be perfect for cooking the fruits and preparing the jam because it won’t burn at the bottom and will ensure ideal cooking and consistency. Plus, the Teflon prevents the syrup from sticking at the bottom and makes cleaning much easier. However, you can use any pot you have at home, always being careful to cook the fruits on low heat and avoid boiling too much to prevent burning the jam. Check out this option! – Versatility and quality in your kitchen!
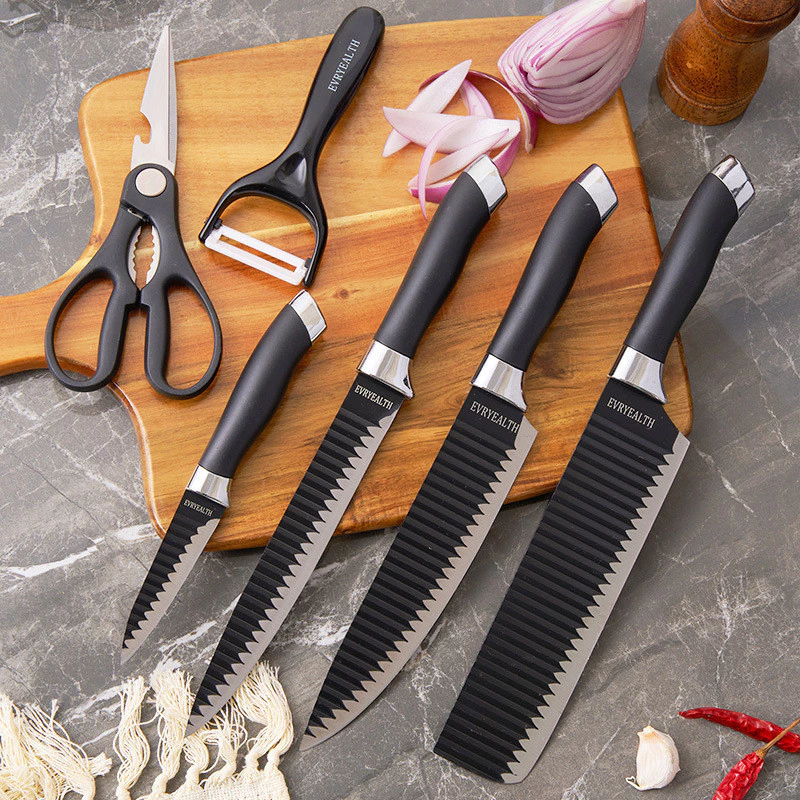
- 6-Piece Non-Stick Knife Set: Useful for peeling fruits and chopping if necessary. It will also be helpful for removing the jam from the jars where it will be stored. Check it out here! – Precision and comfort in cutting!
- Knife Sharpener with Suction Cup: An essential item to keep your knives always sharp and in perfect condition. This model makes usage easier and ensures your safety, preventing accidents when sharpening knives. Check out this option! – Knives always ready to use!
- Mondial Pratica B44R Stand Mixer: This item is not essential for the recipe, but if you plan to make a large quantity or want an option to speed up the recipe, it’s a good choice for mixing the ingredients. Get yours!– Power and convenience for your recipes!
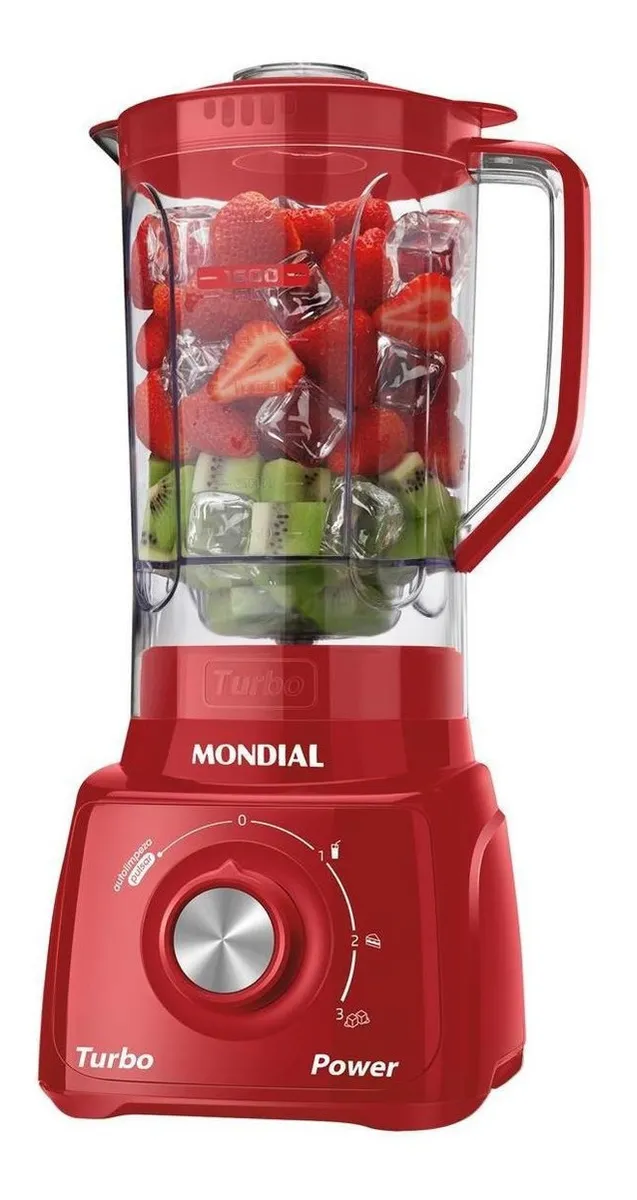
- Philco PLQ2100PI Blender 12 + Turbo 3L 1200W: Although not an indispensable item for this recipe, the blender will help if you choose to make juice, jam, or syrup with the fruits, being essential for thoroughly blending and crushing the fruits and sugar in that case. Check out this option!– Power and speed in the kitchen!
Conclusion
With this recipe of Homemade Blackberry and Raspberry Jam, you have a true culinary wildcard in your hands. Whether to enhance breakfast, add a special touch to desserts, or gift someone dear, this jam is a guaranteed success. The intense sweet and sour flavor of the red fruits, combined with the velvety texture, makes this jam a unique and unforgettable experience. Try making it at home and discover the pleasure of tasting a handcrafted jam, made with care and quality ingredients! On our blog, we have many other recipes like this; feel free to explore and enjoy each one!
Image Source: casadacaubi