Cassava is one of the most versatile and traditional ingredients in Brazilian cuisine, present in various delicious recipes. But if you’re wondering if cassava needs to be cooked before using the airfryer this article will clear up all your doubts! Here, we will explain the ideal methods to make cassava in the airfryer and how to achieve a crispy and delicious texture.
Stay with us until the end and discover everything about this simple and flavorful practice!
Why Use the Airfryer to Prepare Cassava?
The airfryer has become one of the most popular kitchen appliances due to its practicality and the possibility of preparing food in a healthier way, without the need to fry in oil. In the case of cassava, the airfryer is an excellent option to get a crispy outside and tender inside texture without using much fat.
But does cassava need to be cooked before going into the airfryer? Let’s better understand this process and the alternatives to guarantee the best result.
Does Cassava Need to Be Cooked Before Using the Airfryer?
A cassava does not need to be cooked before going into the airfryer, but the preparation process can vary depending on the method you choose. If you opt to put raw cassava directly into the airfryer, it will need a longer cooking time to become tender inside and crispy outside.
However, if you prefer to ensure a more even and tender texture inside, pre-cooking the cassava is a great alternative. Let’s explore these two preparation options so you can choose the one that best suits your taste.
Raw Cassava in the Airfryer
If you decide to prepare raw cassava directly in the airfryer, the process will be quicker, but the texture may not be as tender as cooked cassava. It is important to cut the cassava into small pieces, like sticks or cubes, to facilitate cooking. In this case, the preparation time will be longer and the cassava may be a little harder in some parts.
This option is practical and eliminates the pre-cooking process, but the texture can be less consistent than cooked cassava.
Cooked Cassava in the Airfryer
On the other hand, if you cook the cassava before putting it in the airfryer, it will be much softer inside while keeping the crispiness outside. This method is ideal for those seeking a perfect texture. The preparation time will be reduced, and the final result will be a tasty and well-balanced cassava.
Now that you know both methods, see below the detailed step-by-step to prepare cassava in the airfryer, whether raw or cooked.
Step-by-Step to Prepare Cassava in the Airfryer
Necessary Ingredients:
- Cassava (raw or cooked);
- Olive oil or vegetable oil;
- Salt to taste;
- Seasonings of your preference (optional).
Preparation Method:
- If the cassava is raw: Start by peeling the cassava and cutting it into medium pieces or in the shape of sticks, similar to French fries.
- Preheat the airfryer: Set the temperature to 200°C and let the airfryer heat for about 5 minutes.
- Season the cassava: Brush the cassava pieces with olive oil or oil to ensure they get crispy during cooking. Add salt and other seasonings of your choice.
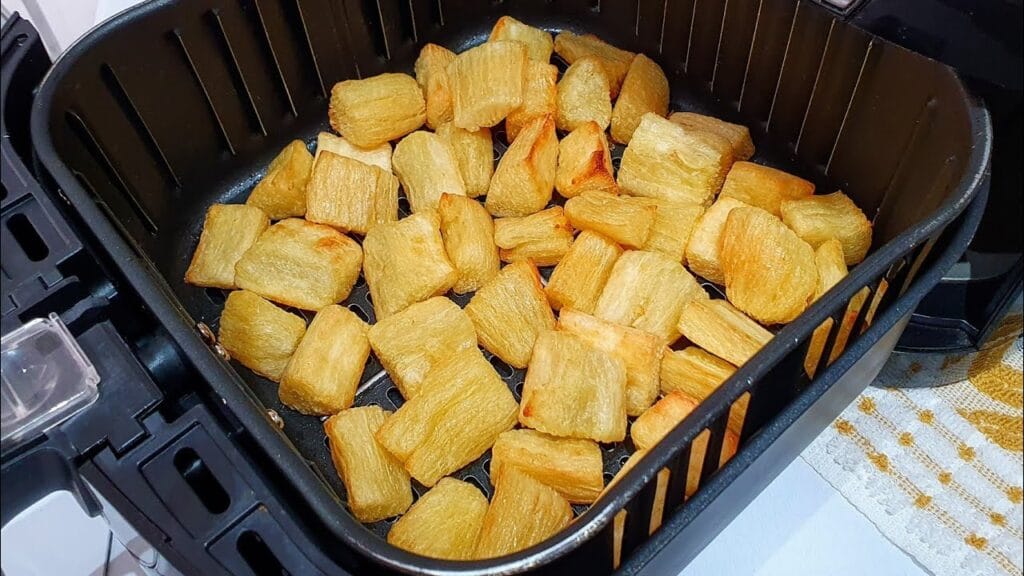
- Bake in the airfryer: Place the cassava pieces in the airfryer basket in a single layer, avoiding overlap. Bake for about 25 to 30 minutes, turning the pieces halfway through.
- If the cassava is cooked: Drain the cooked cassava well, let it cool and follow the same seasoning process. In this case, the cooking time in the airfryer will be reduced to 15 to 20 minutes, depending on the thickness of the pieces.
How Long Does It Take to Cook Cassava?
The cooking time for cassava can vary depending on the method used:
Regular Pot
In a regular pot, cassava takes about 20 to 30 minutes to cook after the water starts boiling. This time can vary depending on the size of the pieces and the quality of the cassava.
Pressure Cooker
In a pressure cooker, the time is much faster. Cassava takes 10 to 15 minutes after reaching pressure. To prevent the cassava from falling apart, use a small amount of water.
Microwave
If you’re in a hurry, you can opt to cook cassava in the microwave. The time varies from 10 to 12 minutes, depending on your microwave’s power. Place the cassava pieces in a covered container with a little water and cook until the cassava is tender but firm enough not to fall apart.
Seasonings to Make Your Cassava Even Tastier
Besides preparing cassava in the airfryer, seasoning it well is the secret to a delicious dish. Here are some seasoning options to make your cassava irresistible:
- Salt;
- Olive oil or butter;
- Black pepper;
- Parsley;
- Chives;
- Cilantro;
- Sweet or hot paprika;
- Cumin;
- Garlic powder;
- Grated Parmesan and oregano;
- Lemon, garlic, and rosemary;
- Butter, honey, and crushed red pepper.
To ensure the seasonings are well distributed, mix them with olive oil or butter before applying to the cassava. This helps create a tasty and even crust.
Can I Freeze Fried or Baked Cassava?
Yes, you can freeze fried or baked cassava, which is a great way to preserve flavor and texture. Here is the step-by-step to freeze cassava efficiently:
- After frying or baking the cassava, let the pieces cool completely;
- Place the pieces on a baking sheet or tray, separating them to prevent sticking;
- Put them in the freezer for about 2 hours;
- Once frozen, transfer the pieces to a plastic bag or airtight container and store in the freezer.
When using again, the best way to reheat frozen cassava is in the airfryer at 180°C for 10 to 15 minutes. This ensures it becomes crispy again, as if freshly made.
Conclusion: Start Preparing Your Cassava in the Airfryer
Now that you know if cassava in the airfryer needs to be cooked or not, what are you waiting for to prepare this delight? With the tips we’ve brought, you can choose the method that best suits your taste and ensure crispy and tender cassava.
Also, try different seasoning combinations and enjoy this dish’s versatility. I’m sure cassava will become one of your favorite side dishes!
Did you like the article? Then, take the opportunity to explore other delicious recipes here on the blog and don’t forget to share your seasoning tips and preparation methods in the comments. Until the next post!
Image Source: espaconatelie