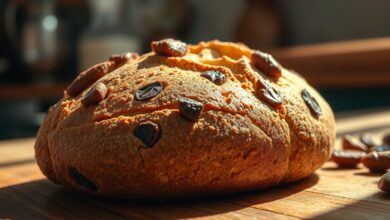


Fluffy and Yellow Corn Cake from Blender
If you are looking for a light, moist corn cake recipe with an irresistible flavor, this one is perfect for you. The blender corn cake combines practicality with a delicate taste, making it ideal to accompany that afternoon coffee or a warm tea. Made with simple ingredients and easy to prepare, it highlights the use of flaked biju corn flour, which gives a unique texture and a special touch.
Biju corn flour: the secret to a perfect cake
One of the main distinctions of the yellow corn cake is the use of flaked biju corn flour, which many confuse with cornmeal or other corn flours available on the market. This flour is made from hydrated corn, ground and then toasted, resulting in crispy and light flakes, similar to biju cassava flour. This characteristic is essential to give the cake that fluffy texture and the distinctive corn flavor.
It is important to distinguish this type of flour from coarse corn flour or milharina, which are pre-cooked and heavier, normally used for couscous and may leave the cake with a denser texture. For our blender corn cake, the flour should be the crispy biju variety, which ensures lightness and flavor.

When measuring the biju corn flour, focus on volume rather than weight. Since this flour can vary in weight depending on the brand or production process, always use a standard tea cup to maintain recipe consistency, disregarding weight in grams or kilograms.


Ingredients for a delicious corn cake
- 1½ cups of green corn (can be fresh, frozen, or well-drained canned)
- 2 cups of flaked biju corn flour, well crumbled
- 1½ cups of sugar
- 1 cup of coconut milk
- ½ cup of milk
- ¾ cup of vegetable oil
- 1 tablespoon of baking powder
- 1 pinch of salt
- 4 eggs
- 1 cup of grated coconut (preferably fresh, for a moister cake)
- Oil or butter for greasing
- Sugar for sprinkling
Green corn can be used fresh directly from the cob, frozen, or canned. All give a soft and flavorful result. Grated coconut is optional but adds moisture and a tropical touch.
For those who prefer to avoid lactose, it is possible to substitute milk with water, but this makes the cake slightly less moist. Additionally, this recipe is naturally gluten-free, ideal for celiac individuals or those avoiding this protein.
How to prepare the blender corn cake
The preparation is simple and quick:
- Preheat the oven to 160ºC (medium temperature).
- Grease a medium pan (pudding or baking pan type) with oil or butter and sprinkle sugar to prevent the cake from sticking and to create a sweet crust.
- In the blender, blend the corn, flaked biju corn flour, sugar, coconut milk, milk, oil, eggs, baking powder, and salt until smooth.
- With a spatula, gently fold in the grated coconut to maintain the pieces.
- Pour the batter into the pan and bake for approximately 45 minutes, or until the cake rises, becomes firm and golden. Perform the toothpick test: if it comes out clean, it is ready.
- Let it cool for about 1 hour before removing from the pan and serving.
Tips for storing and enjoying your corn cake
This cake stays fresh and tasty when stored at room temperature for up to 2 days. After this period, it tends to lose some moisture and texture.
To enhance your tasting experience, serve with brewed coffee, tea, milk, or even a slice of fresh Minas cheese. It is a combination that pleases different palates and makes your moment even more special.
Fluffy and Yellow Blender Corn Cake Recipe
Fluffy and Yellow Blender Corn Cake
8
porções15
minutes45
minutes60
minutes280
kcalAprenda como fazer um bolo de milho amarelinho, fofo e úmido usando farinha de milho biju e ingredientes simples em uma receita prática de liquidificador.
Ingredientes
- Massa
Milho verde fresco, em conserva ou congelado, bem escorrido
Farinha de milho biju flocada
Açúcar
Leite de coco
Leite
Óleo vegetal
Fermento químico em pó
Sal
Ovos
Coco ralado fresco ou seco
Óleo ou manteiga para untar
Açúcar para polvilhar
Modo de Preparo
- Pré-aqueça o forno a 160ºC e unte uma forma média com óleo ou manteiga, polvilhando açúcar em seguida.
- No liquidificador, bata o milho verde, a farinha de milho biju, açúcar, leite de coco, leite, óleo, ovos, fermento e sal até obter uma massa homogênea.
- Incorpore o coco ralado com uma espátula, mantendo os pedaços inteiros.
- Despeje a massa na forma preparada e leve ao forno por aproximadamente 45 minutos, ou até que o bolo esteja dourado e firme. Faça o teste do palito.
- Retire do forno e deixe amornar por cerca de 1 hora antes de desenformar e servir.
Dica da Chef
- Para um bolo sem coco, simplesmente omita o coco ralado e substitua o leite de coco e o leite por 1 e ½ xícaras de leite comum.
- Se desejar o bolo sem lactose, substitua o leite por água, lembrando que o bolo ficará um pouco menos úmido.
- É importante utilizar xícaras padrão para medir a farinha de milho biju, pois seu peso pode variar.
- O bolo é ideal para celíacos, pois não contém trigo ou glúten.
Conclusion
The fluffy, yellow blender corn cake is a great option for those who want to prepare a dessert or snack with simplicity and the authentic flavor of corn. Using biju corn flour ensures a fluffy and crispy texture that pleases everyone. Moreover, the recipe is versatile, adapting to gluten-free and reduced lactose diets. Try making this cake for your special occasions or daily routine and surprise your family and friends with a homemade, delicious, and traditional cake.
For more tasty recipes and culinary tips, visit our internal links and check other options for quick and practical cakes for your day-to-day.